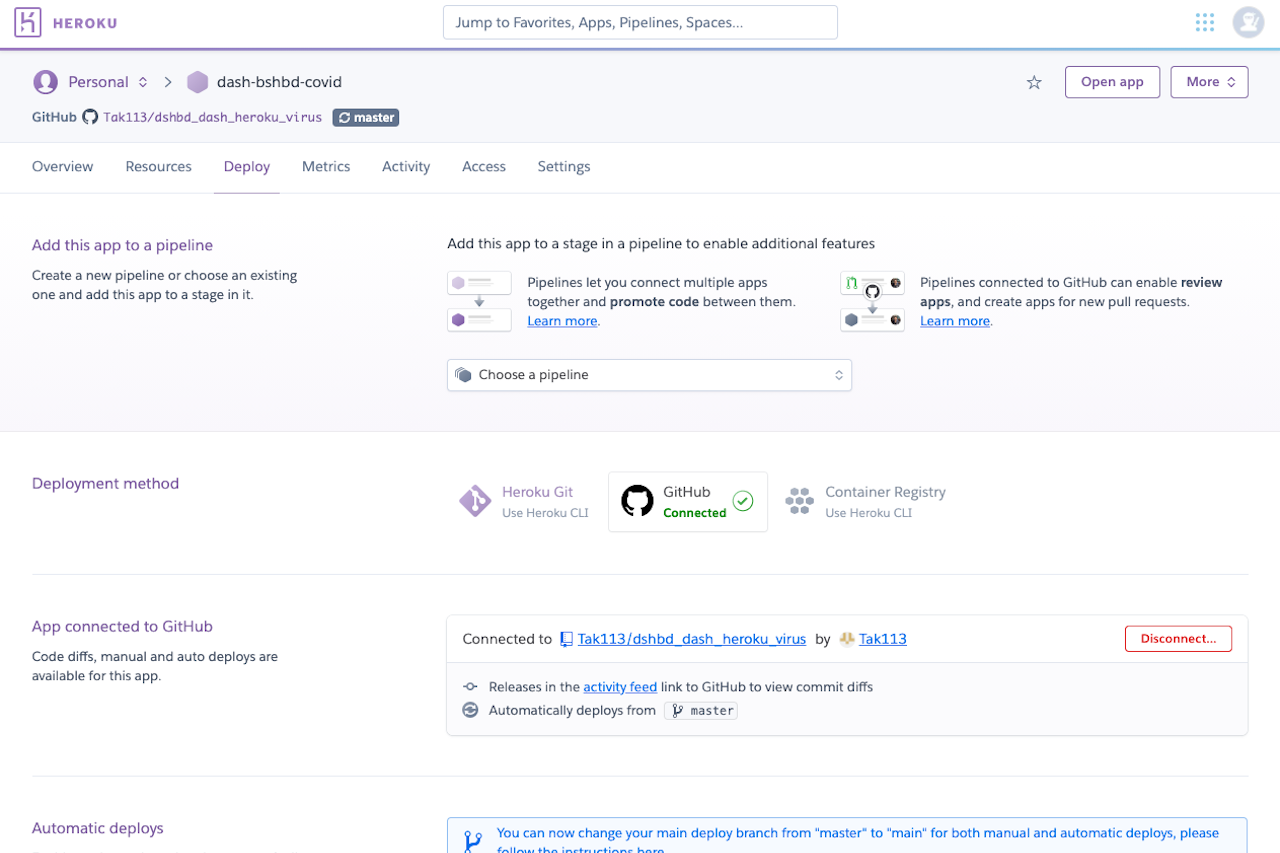
<p>Working app : <a href="https://tak-dash-pipelinetest-github.herokuapp.com/" target="_blank">dashappdemo</a></p><p>Code : <a href="https://github.com/Tak113/dash-heroku-github-pipeline" target="_blank">gitrepo</a></p><h3>STEP1 - Create a directory and have app.py in place</h3><p>create a folder, python dash file, and initialize git. Make sure that all dependent files such as data (ie *.csv) are also moved under the directory.</p><pre>mkdir <directory> cd <directory> mv xxx/app.py <directory>/app.py #assume dash app is developed elsewhere mv xxx/<any dependent files such as data> <directory>/<any dependent files such as data> git init</pre><p>app.py is typical dash file, just changing file name to "app" for a easy read</p><p><br></p><h3>STEP2 - Create virtual environment</h3><p>create a virtual environment for the app, then activate. Make sure you create the <env> under the folder you've made at step1</p><pre>##<directory>## python3 -m virtualenv <env> source <env>/bin/activate</pre><p>then make sure to install dash and relevant libraries, and gunicorn under the environment (pip requirement for some of these might be satisfied already). Make sure that you install all required libraries that is used in <app>.py. For example, if pandas is used in <app>.py, install pandas through pip</p><pre>pip install dash pip install dash-auth pip install dash-renderer pip install dash-core-components pip install dash-html-components pip install plotly pip install gunicorn pip install <any other library used in <app>.py></pre><p><br></p><h3>STEP3 - Prepare required files</h3><p>Following files are needed under <directory>;</p><ul><li><app>.py : a Dash application (name can be different)</li><li>.gitignore : see what should be included below</li><li>Procfile : used for deployment, see what should be included below</li><li>requirements.txt : descrive python dependencies, can be created by code below</li></ul><h4><app>.py</h4><p>add one line of code in app.py</p><pre>##<app>.py## -- server = <app>.server --</pre><h4>.gitignore</h4><pre>subl .gitignore</pre><pre>##<directory>/.gitignore## <env> *.pyc .DS_Store .env</pre><h4>Procfile</h4><pre>subl Procfile</pre><p>note, <app> refers to the filename of the application</p><pre>##Procfile## web: gunicorn <app>:server</pre><h4>Requirements.txt</h4><p>this can be automatically generated by running;</p><pre>pip freeze > requirements.txt</pre><p><br></p><h3>STEP4a - Heroku settings and initial deploy</h3><p><span style="color: rgb(255, 0, 0);">*skip step4 and go to appendix if you would like to use remote repository from github instead of repository from heroku</span></p><p>at the app directory, then just enter to login thru browser (below code automatically goes to browser to login)</p><pre>heroku login</pre><p>create app name, everything are "lower" case, dash, or digit and no space. this is used for url. this code creates app name and as well as git directory</p><pre>heroku create <app name></pre><p>you can check git directory at git.heroku.com by;</p><pre>git remote -v</pre><p>then commit git, note this is git push "heroku" master not git push "origin" master. first push would take time as it has python setting up</p><pre>git add . git commit -m '<description for the commit here>' git push heroku mater</pre><p>run app at web. web=1 dyno is free version</p><pre>heroku ps:scale web=1</pre><p>you can go to browser typing by;</p><pre>heroku open</pre><p>if your app does not run, you can check logs by;</p><pre>heroku logs --tail</pre><p><br></p><h3 style="font-family: "Helvetica Neue", Helvetica, Arial, sans-serif; color: rgb(0, 0, 0);">STEP4b - Update app</h3><p>If there is any changes in your local repository, such as <app>.py files and you would like to reflect that changes to the app, you need to push these changes. You can check changes by</p><pre>git diff</pre><p>If these changes are ok to reflect,</p><pre>git add . git commit -m 'any message here' git push heroku master </pre><p>once deployment is completed,</p><pre>heroku open</pre><p>and check app</p><p><br></p><h3>STEP4 APPENDIX - Connect github.com to heroku</h3><p>Skipping step4, we will create local repository at github. Create new repository at github.com, and then;</p><pre>## at <local directory> ## git init git add . git commit -m '<description for the commit here>' git remote add origin <your github url here, copying from github page> git push origin master</pre><p> Thorough processes are written in the blog here (<a href="http://datak.biz/blog/detail/7/" target="_blank">Command Line 101 : Git</a>).</p><p>At heroku site at your personal page, push "create" button then "Create New App". Note it is not a pipeline but just a connection.</p><p><img src="/media/django-summernote/2020-12-02/24d07807-a2d5-481f-90ee-2144515cd229.png" style="width: 100%;"></p><p>Put app name and push "create app" button</p><p><img src="/media/django-summernote/2020-12-02/7f6eff60-bb1f-41ac-919c-e1c5cf672c90.png" style="width: 100%;"></p><p>Choose "GitHub" as deployment method.</p><p><img src="/media/django-summernote/2020-12-02/a41a176c-ec34-4987-a237-3490c09ee3f4.png" style="width: 100%;"></p><p>At same "deploy" tab, going down, push "enable automatic deploys" at "automatic deploys" swimlane. You could go with manual deploy if you push "deploy branch" at manual deploy swim lane. <span style="color: rgb(255, 0, 0);">Note, you need to use manual deploy at the first time.</span></p><p><img src="/media/django-summernote/2020-12-02/59af1508-58da-461d-be8a-1c43a9b14804.png" style="width: 100%;"></p><p>Automatic build will be started shortly pulling data from github remote repository, and you will see the status at Activity tab</p><p><img src="/media/django-summernote/2020-12-02/aeaf96bd-4a1a-4682-85ae-2bfc9c305167.png" style="width: 100%;"><br></p><p>With this automation, once repository at github is updated (same branch you choose for a connection), that change will be automatically reflected to the heroku dash app.</p><p>After that you need to set scaling. For the app which does not use git.heroku.com needs to specify which heroku app we are operating at CLI as follows;</p><pre>heroku ##any operation here## --app <your app name></pre><p>So scaling set is based on;</p><pre style="line-height: 1.42857;">heroku ps:scale web=1 --app <your app name></pre><p style="line-height: 1.42857;">And if your application is crashed you can see the log here;</p><pre>heroku logs --tail --app <your app name></pre><p><br></p><p>Source : <a href="https://austinlasseter.medium.com/how-to-deploy-a-simple-plotly-dash-app-to-heroku-622a2216eb73" target="_blank">How to deploy a simple Python app using nothing but Github and Heroku</a><br></p><h3><br></h3>
<< Back to Blog Posts
Back to Home